The world of crafting has been revolutionized with the introduction of Cricut machines. These versatile devices are a game-changer for those who love to personalize everything, from home decor to clothing. But to get the most out of your Cricut machine, there are certain Cricut tools you must have, which we’ll discuss in detail in this article.
These tools don’t just make your projects easier; they also enable you to expand your creativity to new heights. From basic tools to advanced ones, having the right accessories can drastically improve your crafting experience. So whether you’re a seasoned crafter or a beginner just dipping your toes into the world of Cricut, this guide to must-have Cricut tools will surely be beneficial.
Hey there crafters! Are you ready to revolutionize your crafting experience with a Cricut machine? With the right tools and accessories, you can take your projects to the next level and unleash your creativity. In this article, we’ll give you the rundown on the must-have Cricut tools so you can get the most out of your machine. From basics to advanced accessories, you’ll get all the info you need to upgrade your crafting experience. So let’s dive in and explore the world of Cricut tools!
Cricut Machine
Choosing the right Cricut Machine for your project is paramount to its success. A clear understanding of each machine’s unique features and capabilities is also essential. Once you’ve made your choice, proper setup and connection are crucial. To fully exploit the potential of your Cricut machine, you should be aware of how to maximize its capabilities. Additionally, crafting with different materials requires different approaches, so understanding how to use your Cricut Machine with various materials is key.
Choose the Right Machine for Your Project
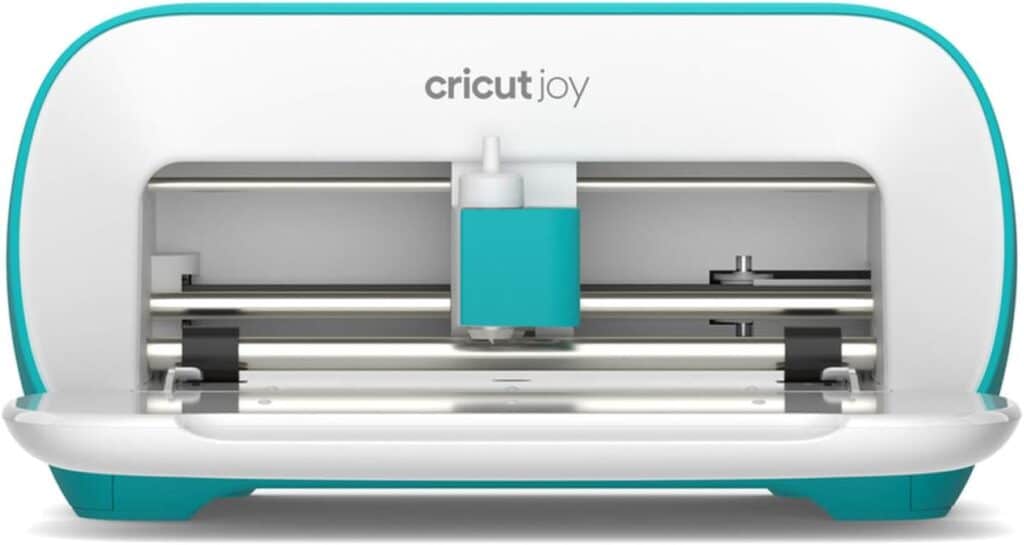
Moving away from the broad overview of Cricut machines, it’s time to delve into the specifics of choosing the right machine for your project. The Cricut machine family includes the Cricut Joy, Cricut Explore Air 2, and the Cricut Maker. Each machine serves a different purpose depending on your needs. The Cricut Joy is compact and perfect for smaller projects, while the Cricut Explore Air 2 is a versatile, all-purpose machine. If you’re into serious crafting, the Cricut Maker, with its advanced cutting abilities, might be your ideal choice. Always consider the scope and complexity of your projects before deciding on the suitable machine.
Understanding Machine Features and Capabilities
Having selected the ideal machine for your project, it’s time to delve deeper into the world of Cricut. Let’s get familiar with your machine’s features and capabilities. Each Cricut machine model has unique features aimed at different crafting needs. Understanding these will help you leverage the full potential of your machine. Some models, for example, have a Print then Cut feature, which allows you to print designs and then cut them out, perfect for customized stickers and labels. Others offer the Smart Set Dial for easy material setting. Your machine’s features and capabilities are your crafting superpowers. Learning them will open up a world of creative possibilities.
Setting Up and Connecting Your Machine
Shifting our focus to a more hands-on aspect, let’s discuss Setting Up and Connecting Your Cricut Machine. To begin, make sure you have a compatible device (PC/Mac/iOS/Android) and a strong internet connection. Connect your Cricut machine to your device using the included USB cable or via Bluetooth. Follow the prompt to create a Cricut ID or sign in if you already have one. The Cricut Design Space software, which is fundamental for all your crafting projects, will guide you through the rest of the set-up process. Remember, initial setup is crucial as it paves the way for a smooth crafting journey ahead.
Cricut Tools You Must Have – Cutting Mat
In understanding Cutting Mats, we’ll delve into the Different Types of Cutting Mats available and their unique features. Afterwards, we’ll focus on the Care and Maintenance of Your Cutting Mat to ensure longevity. The discussion will then transition towards Choosing the Right Mat for Your Project, to help you make an informed decision. We’ll also cover the Best Brands of Cutting Mats, providing you with quality options. Lastly, we’ll discuss crucial Cutting Mat Safety Tips to avoid any mishaps during usage.
Different Types of Cutting Mats
Transitioning from the world of Cricut machines, let us now delve into an equally significant accessory – the cutting mat. Cutting mats come in various shapes and sizes, each suitable for different types of tasks. We have the self-healing mats, which are designed to withstand cuts from sharp blades, effectively sealing the cuts and prolonging their lifespan. There are also rotary mats that are used in conjunction with rotary cutters, offering a smooth and precise cutting experience. Lastly, we have double-sided cutting mats, offering surface protection on both sides for enhanced durability. Each type has its own unique characteristics, and choosing the right one truly depends on the nature of your project.
Care and Maintenance of Your Cutting Mat
After learning about the Cricut Machine, it’s important to turn our attention to how to properly care for one of the key accessories: the cutting mat. Proper maintenance of your cutting mat can prolong its lifespan and enhance its performance. Always remember to clean your mat after each use to remove any leftover material. Mild soap and warm water can be applied using a soft scrub brush. It’s also crucial to store your mat flat and away from direct heat or sunlight. Never fold or roll your mat, as this can cause permanent damage. Remember, a well-maintained mat not only ensures precision cuts but also protects your expensive Cricut blades.
Choosing the Right Mat for Your Project
Now that we’ve explored the world of Cricut machines, let’s shift our focus to an equally important tool – the cutting mat. Specifically, let’s discuss how to choose the right mat for your project. This choice is crucial as it can significantly affect the precision and quality of your work. First, you need to consider the material you will be cutting. Hard materials like leather require a sturdy, self-healing mat, while softer fabrics can be handled with a standard mat. Also, the size of your project matters. Larger projects need larger mats. Remember, the right mat not only ensures clean cuts but also extends the lifespan of your cutting blades.
Cricut Tools You Must Have – Design Software
First, we’ll delve into Downloading and Installing the Software, guiding you through every step. Once the software is ready, we’ll help you Understand the Basics of Designing, focusing on editing, resizing, and saving projects. As your skills mature, we’ll explore Advanced Techniques in Cricut Design, taking your creativity to new heights. Lastly, we’ll unleash your imagination by Creating Custom Designs with Cricut Software, giving you the tools to bring your unique visions to life. Each section is important in mastering Design Software, so let’s embark on this journey together.
Downloading and Installing the Software
Now that we’ve covered the essentials about the cutting mat, let’s dive into the digital world of Cricut Design Software. This is where your creativity truly comes to life. To kickstart your journey, the first step is Downloading and Installing the Software. Visit the official Cricut website, and navigate to the software download page. Here, you’ll find versions suitable for both Windows and Mac operating systems. Once you’ve downloaded the correct version, follow the installation prompts. It’s crucial to ensure your system meets the software’s minimum requirements for a seamless crafting experience. In the next section, we’ll delve into understanding the basics of designing.
Understanding the Basics of Designing
As you bid farewell to the physical element of crafting with your cutting mat, embrace the digital world of creativity with your design software. Understanding the basics of designing is like learning a new language. Start by familiarizing yourself with the user interface and tools available. The heart of your design lies in shapes, layers, and colors. Learn to manipulate these basic elements to create beautiful and intricate designs. Remember, each click, drag, and drop you make on the software will translate into cuts on your material. Embrace the possibilities and let your creative juices flow in this digital playground.
Editing, Resizing, and Saving Projects
With the cutting mat mastered, it is time to venture into the realm of virtual creativity. As you navigate through the Cricut design software, you will find that editing, resizing, and saving projects is a cinch. The software is designed to make these operations intuitive and user-friendly. To edit a design, simply select it and use the tools in the toolbar. Resizing is as easy as dragging the corners of your design to your desired dimensions. Remember to save your work frequently. Click on the File menu and select Save to ensure all changes are kept. Mastering these basic functionalities will empower you in your creative journey.
Cricut Tools You Must Have – Vinyl
Delve into the world of Vinyl, starting with its Types. Afterward, preparation steps for Cutting Your Vinyl are detailed. Then, we venture into Applying and Removing Vinyl. The journey continues with a review of the Best Vinyl Brands for Cricut. Lastly, we provide guidance on Creating Vinyl Decals.
Types of Vinyl
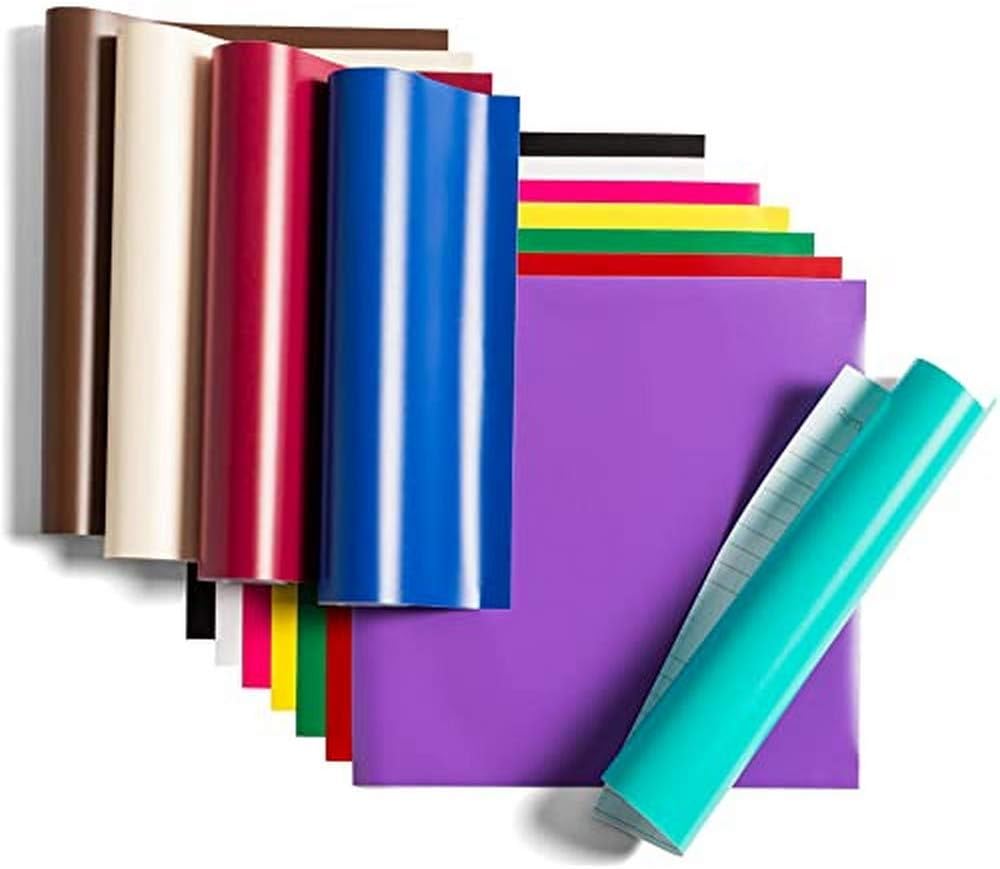
As we journey from the digital realm of design software, let’s immerse ourselves in the tangible world of vinyl. Vinyl comes in a variety of types, each with its own characteristics and applications. The most common types include Adhesive Vinyl and Heat Transfer Vinyl. Adhesive Vinyl is typically used for signs, stickers, and decals, while Heat Transfer Vinyl is a special type used for fabrics and textiles. There’s also Printable Vinyl that can be used with a regular home printer. Understanding the various types of vinyl is crucial to ensuring the success of your project. Remember, choosing the right vinyl is just as important as having a great design.
Preparing Your Vinyl for Cutting
Transitioning from the realm of Design Software, we now dive into the world of Vinyl. An essential part of the process is Preparing Your Vinyl for Cutting. To ensure a smooth cut, always start with a clean, flat surface for your vinyl. Placing it on a non-dust surface prevents unwanted particles from sticking to the adhesive side. Furthermore, it’s crucial to determine the right side up. The vinyl’s color side should face up, while the paper backing faces down on the mat. Lastly, remember to use a brayer or scraper tool to firmly adhere the material to the cutting mat. This preparation is integral to achieving perfectly cut vinyl pieces.
Applying and Removing Vinyl
Leaving the world of design software behind, let’s delve into the tactile realm of vinyl. Applying vinyl is an art in itself. One needs to be gentle yet firm. Start by cleaning the surface thoroughly where the vinyl is to be applied. Then, carefully position the vinyl and press it onto the surface, starting from the middle and moving outwards to avoid any air bubbles. When it comes to removing vinyl, heat is your friend. Use a hair dryer or a heat gun to warm up the vinyl, making it easier to peel off without leaving any residue behind. Remember, patience and practice make perfect in the world of vinyl application and removal.
Cricut Tools You Must Have – Transfer Tape
Firstly, we will delve into selecting the right transfer tape, a crucial step to ensure successful application. Next, we will guide you through the process of applying transfer tape smoothly. After application, the next step is removing transfer tape proficiently without damaging your project. We’ll then provide some handy tips for applying transfer tape to help you master this task. Finally, we’ll share our top picks for the best brands of transfer tape, to aid your decision-making process.
Selecting the Right Transfer Tape
Just as the vinyl is essential, so too is the transfer tape which is used in the application process. When it comes to selecting the right transfer tape, there are a few key factors to consider. Firstly, consider the type of vinyl you’re using. For example, glitter vinyl often requires a stronger grip transfer tape, while regular vinyl works well with medium or light grip tape. Secondly, the size of your project matters. For larger projects, wider transfer tape is often more efficient. Lastly, don’t overlook the importance of a clear transfer tape which allows you to see exactly where you’re placing your design.
Applying Transfer Tape
Saying goodbye to the world of vinyl, we now venture into the realm of transfer tape. Applying Transfer Tape can be a bit tricky, but with some patience and the right technique, you’ll get the hang of it. Start by placing the transfer tape on your vinyl design, ensuring the tape covers the entire design. Apply pressure to the tape with a squeegee or credit card, moving in a back-and-forth motion. This process is called burnishing. Once the tape adheres to the design, slowly peel off the tape’s backing. Voila! Your design is ready to be transferred to your desired surface. Remember, practice makes perfect.
Removing Transfer Tape
Having discussed the importance of vinyl in crafting, let’s now look at an equally crucial tool: transfer tape. Specifically, let’s dive into removing transfer tape from your masterpiece. The key to a smooth removal lies in patience and gentle force. Rushing might damage your project. Start from a corner and pull the tape back over itself, maintaining a low angle. This minimizes the tension on the applied vinyl. If you encounter resistance, apply heat with a hairdryer to loosen the adhesive. Lastly, remember that each brand of transfer tape might require a slightly different removal technique, so always refer to the manufacturer’s instructions.
Cricut Tools You Must Have – Weeding Tools
The topic, Weeding Tools, encompasses a variety of subtopics. We’ll start with identifying the Types of Weeding Tools available in the market, before moving onto Weeding Basics, which set the foundation for effective gardening. We’ll also share some Tips for Weeding with Precision to ensure your garden stays neat and tidy. As tools are bound to wear out, the section on Maintaining Weeding Tools will guide you on how to prolong their lifespan. Last but not least, Weeding Tool Techniques will provide practical ways to effectively use these tools.
Types of Weeding Tools
After mastering the art of using transfer tape, it’s time to dive into the world of weeding tools. There are several types of weeding tools that are crucial for successful craft projects. Pin Pen Weeding Tools are perfect for vinyl, HTV, paper, and more, enabling you to remove unnecessary parts with precision. Tweezer-like Weeding Tools are excellent for picking up small pieces from intricate designs. Hook Weeding Tools are ideal for larger vinyl projects, making the weeding process faster and more efficient. Lastly, Scrape Weeding Tools come in handy for removing vinyl from your cutting mat. Each of these tools brings unique benefits to your crafting experience.
Weeding Basics
Shifting gears from transfer tape, the next essential aspect of your crafting journey is understanding weeding basics. Weeding, in crafting terminology, is the process of removing excess material from your design. The goal is to leave only your desired image on the transfer tape. It’s essential to apply slow and gentle pressure while weeding to avoid damaging the design. Start from the outer edges and work your way towards the center to minimize the risk of tearing. One pro tip is to use good lighting to ensure you don’t miss any small cutouts. Patience is key in weeding. Remember, rushing can lead to errors.
Tips for Weeding with Precision
Transitioning from the specifics of transfer tape, let’s shift gears to something more hands-on: weeding with precision. The task can initially seem daunting, but the right techniques can make a world of difference. Always start by using sharp tools, as blunt ones can damage your project. Take your time – rushing often leads to mistakes. It is also advisable to work in a well-lit area to clearly see all details. Additionally, consider using a weeding box. This simple tool helps keep your work neat and prevents accidental removal of necessary parts. Lastly, remember that practice makes perfect. The more you weed, the better you’ll get.
Cricut Tools You Must Have – Blades and Pens
In exploring the topic of Blades and Pens, it’s crucial to grasp multiple subtopics. Firstly, we’ll delve into Selecting the Right Blades and Pens then move to Understanding the Different Types of Pens. Subsequently, we’ll discuss Replacing and Cleaning Your Blades and Pens to ensure optimal performance. Then, we’ll guide you in Selecting the Right Blade for Your Project. Lastly, we’ll shed light on The Lifespan of Cricut Pens and Blades for you to gauge their longevity effectively.
Selecting the Right Blades and Pens
Leaving the world of weeding tools behind, we find ourselves amidst a sea of blades and pens. Picking the perfect blades and pens for your project can be as challenging as finding a needle in a haystack. It is crucial to understand that not all blades and pens are created equal – each has a unique purpose and use. The right selection can significantly enhance your project’s precision and overall finish, while the wrong choice can lead to disappointment. Choosing the right tools will depend on your project’s material, depth, and intricacy. In upcoming sections, we will delve deeper into understanding the different types of pens, blade maintenance, and more.
Understanding the Different Types of Pens
Just like weeding tools, blades and pens are equally significant in any crafting project. Moving forward, let’s delve deeper into Understanding the Different Types of Pens. Just as blades are essential for cutting, pens play a crucial role in adding details and personalization to your projects. There are various types of pens available, each having unique characteristics and purposes. From fine point pens for intricate details, infusible ink pens for vibrant colors, to washable fabric pens for fabric projects, understanding these variations is key. By knowing the differences, you can effectively choose the right pen for your projects, resulting in a more professional and personalized finish.
Replacing and Cleaning Your Blades and Pens
While weeding tools help maintain the quality of your projects, the maintenance of your blades and pens is another key factor to consider. A well-maintained pen or blade ensures the best possible performance. To replace your blade or pen, simply remove the old one from your machine and insert the new one. Remember to handle blades with care due to their sharpness. Cleaning your blades and pens is straightforward: gently wipe them with a soft, dry cloth to remove any debris. Be sure to always unplug your machine before cleaning or replacing parts to avoid any risk of injury. Regular maintenance can significantly extend the lifespan of your crafting tools.
Cricut Tools You Must Have – Adhesive
Choosing the right adhesive can make a world of difference for your projects. Let’s discuss how to select the best one. Next, we’ll delve into the practical aspects of using adhesive with your projects. Afterwards, we’ll tackle the sometimes tricky issue of cleaning up adhesive residue. For the DIY enthusiasts, you’ll find the segment on DIY adhesive solutions for Cricut quite insightful. Lastly, we’ll explore some Cricut adhesive alternatives that offer unique benefits.
Selecting the Right Adhesive
Moving from the precision of blades and pens, we now delve into the sticky world of adhesives. When it comes to selecting the right adhesive for your Cricut projects, the options can be overwhelming. Different materials and designs demand various types of adhesives. For cardstock and paper, a simple glue stick or a tape runner can be perfect. If you’re working with heavier materials like leather or wood, a stronger adhesive, such as a glue gun or E6000, would be more suitable. Always remember, the key is to balance sturdiness with flexibility. With the right adhesive, your project will hold together beautifully while still allowing for some movement.
Using Adhesive with Your Projects
Moving from sharpness to stickiness, let’s delve into the world of adhesives. When using adhesive with your Cricut projects, it’s important to consider both the strength and flexibility of your chosen adhesive. Depending on the material you are working with, you may need a stronger or more flexible adhesive. This can range from a heavy-duty glue for hard materials like wood or metal, to a more pliable adhesive for fabrics and papers. Always ensure the adhesive is fully dried before moving on to the next step of your project. Remove any excess adhesive immediately to prevent it from hardening and potentially damaging your project. It’s all about finding the right balance to achieve a seamless finish.
Cleaning Up Adhesive Residue
While the precision of blades and pens is paramount, a seamless craft project often hinges on the effective use of adhesives. Particularly when dealing with the problematic issue of Cleaning Up Adhesive Residue. To remove residue, gently scrape it off with a plastic scraper or your fingernails. For more stubborn residue, a citrus-based cleaner or adhesive remover can be used. However, always test these products on a small, inconspicuous area of your project first to ensure they won’t cause damage. Do not use sharp objects or abrasive cleaners as they can scratch or otherwise harm your project surface. With the right approach, adhesive clean-up doesn’t have to be a sticky situation!
Conclusion
In conclusion, owning the right Cricut tools can elevate your crafting experience significantly. From the Cricut machine to cutting mats, design software, vinyl, and transfer tape, each tool plays a crucial role in the crafting process.
Moreover, don’t overlook the importance of weeding tools, blades and pens, and adhesive. These tools ensure precision and ease in your craftwork. So, whether you’re a novice or a seasoned crafter, these are the must-have Cricut tools for an optimal crafting experience.